- Prix ordinaire
- $19.99
- Prix soldes
- $19.99
- Prix ordinaire
- $19.99
Épuisé
- Prix unitaire
- par
Liquid error (snippets/snip-product-variants line 28): product form must be given a product
Free shipping on Canadian orders over $150
Shop now, pay later with Afterpay

Your piercing looks great. It doesn’t hurt. There hasn’t been a crusty in sight for weeks.
You're even thinking about GASP sleeping on it.
So… it’s healed, right?
Maybe.
One of the trickiest things about piercings is that they heal from the outside in. The skin you can see may look perfectly normal while the inside of the piercing channel is still developing and surprisingly fragile. I've fallen victim to this a few times and when I went to raw dog my new jewelry in, BAM, out came the fistula!
So before you take out your jewelry and continue your ear-curation journey, here’s how to tell whether your piercing is actually ready.
There isn't one magical sign.
Instead, we look at a combination of time + how the piercing looks + how it feels + how it's behaving.
A piercing that's ready for a jewelry change should generally:
✓ Have met or passed its expected minimum healing period
✓ Have no ongoing tenderness or pain
✓ Have no persistent swelling
✓ Have no redness or heat
✓ No longer be producing discharge or regular crusting
✓ Feel settled rather than easily irritated
Please remember: “It doesn't hurt anymore” isn't the same thing as “it's healed.”

Not all piercings heal at the same speed. Lobes generally heal faster than cartilage, largely because the soft tissue of the lobe has a better blood supply than the cartilage. Lobes are also less prone to angle changes caused by pressure (i.e. sleeping on it) than cartilage piercings are.
As a general guide:
Lobe piercings: approximately 3–6 months
Cartilage piercings: approximately 6–12 months - sometimes longer (2+ years)

That means piercings like your helix, flat, tragus, helixes, conch, rook and daith require a little more patience than a standard lobe piercing.
And remember: these are average healing ranges, not deadlines. Your anatomy, placement, lifestyle, aftercare and whether the piercing has been bumped, slept on or irritated can all affect how long healing takes.
So if you hit the six-month mark and your cartilage piercing is still occasionally tender or crusty, the calendar doesn't get the final say. Your piercing does.
Before changing your jewelry, look at the whole picture: enough time has passed and the piercing is calm, comfortable and no longer showing signs that it's still actively healing. Don't be that person that thinks it's ready too early, I beg you!
Here's where things get interesting.
Sometimes a piercing looks completely healed until you actually try to change the jewelry.
You remove the post and the channel feels tender. Maybe the new jewelry doesn't slide through easily (sometimes not at all). Maybe you feel resistance, stinging or discomfort. Perhaps the piercing becomes red or starts swelling.
Your piercing may have just told you something:
“Actually, I wasn't quite done yet.”
Don't force it.
Piercing channels can also begin shrinking surprisingly quickly once jewelry is removed - even in established piercings - so don't leave the piercing empty while you decide what to do. This is also why we tell you to leave your piercing jewelry in at all times while it's healing.
First: don't panic and don't force anything.
We often send your taper home with you after your piercing appointment. If you have this and you feel comfortable using it, you can reinsert the barbell from the back of the piercing and then insert the decorative end into the barbell and pinch together. Just make sure you give the taper and barbell a little clean and use clean hands. If you don't have a taper, it's a great tool to keep in your jewelry box which you can purchase from us here.

If you don't have a taper or don't feel comfortable using it, you can use any butterfly back stud earring that you deem appropriate for the area to keep the channel open. It's important that you do this asap as an unhealed piercing can close in a matter of hours. Clean the earring first, then with clean hands, insert it into the piercing from the front, pop the back on (not too tight) and contact us or your piercer for next steps. Always make sure you clean the piercing afterward.
If the jewelry doesn't go in easily, stop.
Trying to push jewelry through a tight or irritated channel can just make things. A professional piercer may be able to use an insertion taper to guide jewelry through a channel that has tightened without needing to repierce it.
Do not keep poking around trying to “find the hole.”
That's how a simple premature jewelry change becomes a very angry piercing.
Come see us or your piercer instead.
If you have significant swelling, worsening pain, spreading redness, heat, pus-like discharge, fever or you're concerned about infection, seek appropriate medical advice rather than simply removing the jewelry yourself.
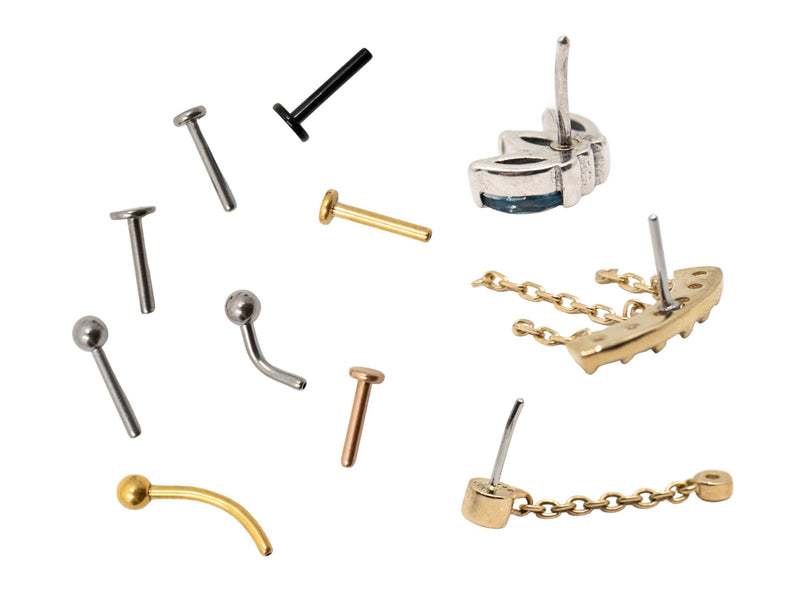
If you've had a piercing done at The Curated Lobe that's using a straight or curved barbell, you're wearing threadless jewelry.
This means there is no threading involved at all (there are no screws - it's pressure fit).
Threadless jewelry has two main pieces:
The post: the hollow piece that sits through your piercing.
The decorative end (a.k.a top): the pretty part you see, with a tiny insertion pin attached to the back.
That pin has a very slight bend in it. When it's pushed inside the hollow post, that bend creates tension that holds the two pieces together.
No screws. No twisting. Just tension.

First, make sure you do it leaning over the sink, in front of the mirror. Place a towel in the sink over the drain and the basin. This way, if you drop anything it doesn't bounce into the abyss or disappear down the drain. Trust me on this one, I've lost a few grand to the sewer monsters. Then, wash and dry your hands (very well so you have good grip).
Next:
1. Hold the flat back firmly with one hand. Get your nails in there if you've got 'em.
2. Grip the decorative end with your other hand. Again, nails.
3. Pull the two pieces straight apart.
You don't need to unscrew it because there are no threads, remember?

If it's slippery, clean non-woven gauze or paper towel can give you a little extra grip. Better yet, use gloves and/or hemostats if you've got 'em. At our studios we give you the hemostats after your appointment with the taper, too.
And if you're pulling, pulling, pulling and nothing is happening?
Please stop before your ear becomes part of the tug-of-war.
Come see us and we'll remove it for you.
This part is easier once you understand how the mechanism works.
Insert the flat-back post through your healed piercing. It's best if you use a taper so you're not jamming the blunt end of the barbell through. It's also great if you can use some water-based lubricant to ensure that you put the least amount of stress on the piercing channel (fistula) as possible.
Then place the decorative end's pin into the hollow post and pinch the pieces together to secure.
You should be met with some resistance, however it should not be too difficult. The pin should have a slight bend to create tension against the inside of the hollow barbell.
If the pin slides into the barbell too easily, you risk losing the jewelry.
If the pin has too much of a bend, you risk bending the pin 90 degrees when trying to pinch together, making it hard to get the correct bend back and potentially damaging your decorative part.
Additionally, if you have quite a large threadless end and it's a 14k gold piece, remember that metal is soft and if you put too much pressure when pushing it into the barbell, you may warp the piece which can misshape it or cause stones to become loose. This is difficult or impossible to fix.
You should not see a gap between the decorative end and the barbell, exposing some of the pin.
If you're not confident doing this yourself, we'll happily change it for you.
You can book a jewelry change here.
Once your piercing is genuinely healed, your jewelry options open up considerably.
But choosing new jewelry isn't just about finding something pretty.
You also need to think about:
SIZE - Is the post length or ring diameter appropriate for your anatomy?
GAUGE - Is it the correct thickness for your piercing?
MATERIAL - Is it appropriate for long-term wear?
WEIGHT - Is the piece appropriate for that particular placement?
STYLE - Will its shape put pressure on neighbouring piercings?
LIFESTYLE - Will you comfortably sleep, exercise and live in it?
In other words:
Just because it fits through the hole doesn't mean it belongs there.
Shop jewelry upgrades here.
Upgrading your jewelry doesn’t always mean replacing the piece you already have. Once your piercings are fully healed, charms and chains can completely change your look without adding another piercing.
Add a charm to a hoop for a little movement, connect two piercings with a delicate chain, or layer multiple chains to create a more dramatic curated look. Chains are a great way to tie different piercings together and make your ear feel more intentionally styled.
Shop chains here.
The key is fit. Chains that are too short can pull on your piercings, while chains that are too long can snag and move around excessively.
Not sure what length you need? We offer custom chain sizing in studio, so we can measure your piercings, create the chain to fit your anatomy and install it - all in the same appointment.
You can book a custom chain sizing here.
Because guessing your chain length online can be time consuming and expensive.

For everyday wear, we're big fans of implant-grade titanium and 14k solid gold.
Because let's be so for real, no one is taking all their hardware out errryday.
Implant-grade titanium is lightweight, inexpensive and an excellent option for people with sensitive ears.
Solid 14k gold is timeless and more malleable, which allows for more intricate designs.
Once a piercing is fully healed, you may have additional jewelry options that wouldn't necessarily have been appropriate during the initial healing period. But material quality still matters - especially if you're planning to wear the piece 24/7. For example, you would not wear gold vermeil permanently.
And if you're someone whose ears react to everything?
This probably isn't the moment to celebrate your healed piercing with mystery metal.
Healed doesn't automatically mean every piece of jewelry is appropriate for every piercing.
I've had so many clients that cannot wear hoops in their cartilage, no matter how many years the piercing has been healed for. This is when our custom chain sizing comes up to bat!
Ring diameter, thickness, weight, shape, anatomy and placement all matter.
Some piercings also need additional time to mature before they're happy wearing jewelry that creates different movement or pressure than the post they healed with.
If you're not sure, bring us the jewelry - or better yet, let us help you choose it.
Healing a piercing takes patience. Remember what they say? Pain is temporary, swag is fovever!
You kept your hands off it. You didn't sleep on it. You cleaned it. You downsized it.
You resisted changing it twelve times because TikTok showed you a cute earring.
You wined and dined that hoe.
You've earned this.
Once your piercing is fully healed, upgrading your jewelry is one of the best parts of having it.
Keep your existing look, swap your decorative end, add a hoop, introduce a chain or let us build a completely new ear stack around it.
And if you're standing in front of the mirror holding two tiny pieces of threadless jewelry thinking, how on earth am I supposed to get this in?
We do this all day.